Fun New Series: Stamping for Scrapbookers
Hi Friends!
A few scrappy friends and I have gotten together to start a new series over on our You Tube channels. This new series is going to focus on stamping techniques, products, and ideas for scrapbookers. We are all totally in love with taking the inspiration and products that we see designed for card making and transforming that into amazing projects with the scrapooking audience in mind. The products and techniques in the card making world are SO versatile and fun that we just cannot wait to share ideas with you each and every month. We have a theme each month and this month our theme was FOOD stamps.
For today’s project, I grabbed a couple of stamp sets and some of my favorite Catherine Pooler inks. The technique that I am sharing today is a hybrid of some things that I have picked up from my dear friend Sara Scraps as well as a technique that Jennifer McGuire recently featured on one of her cards.
This technique is super fun and easy to create! Make sure to stop by the video to check out the more in-depth process that I used. But, the quick and easy version goes like this….

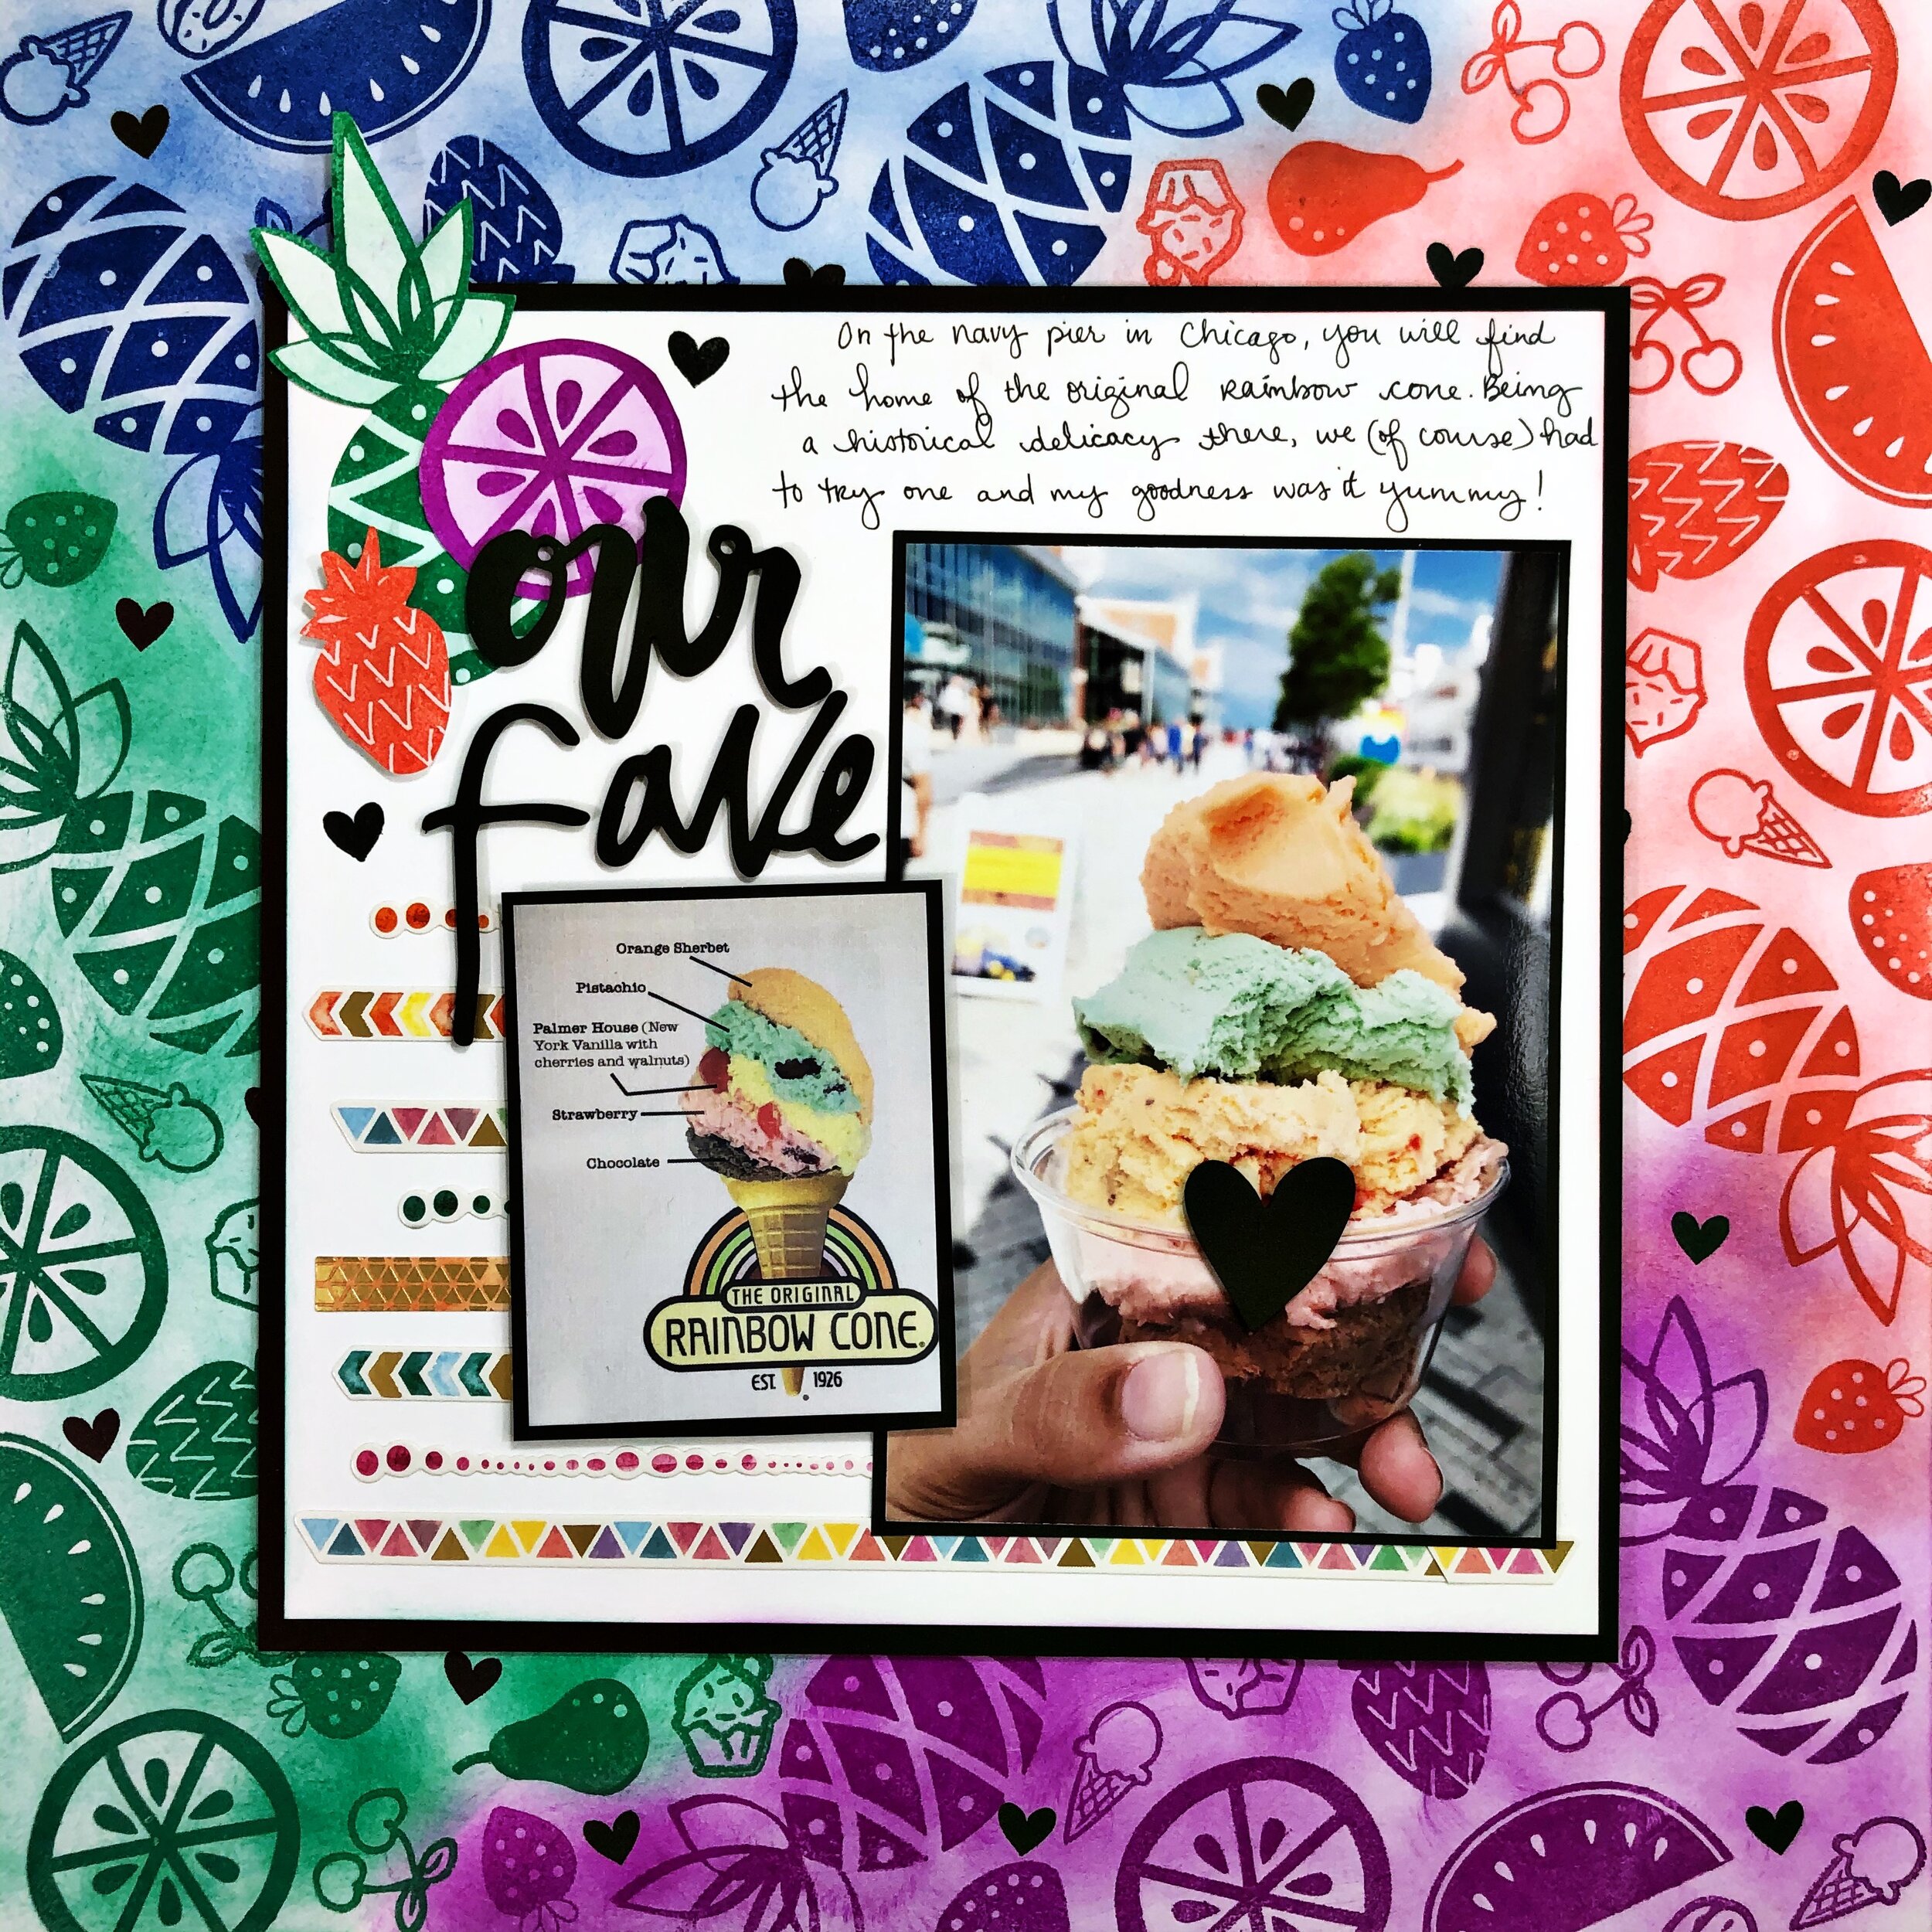
Step One: Lay our background cardstock on the memory Misti surface (or your craft mat even) and line up all the stamps that you want to use in a big cluster along the edge of the paper. I mixed and matched a bunch of stamps and then used my Misti top to pick them all up in just the right position. I started with one ink color and stamped the images all at once.
Step Two: Rotate your background paper ninety degrees (one turn) and your stamps are already lined up on the Misti to create another image. Switch ink colors and stamp again. Complete this step until. you have stamped on all four sides of the background paper with all four ink colors that you have chosen.
Step Three: Fill in the gaps by rearranging or introducing new stamps. I set up two separate clusters for the corners of my layout at this point and then stamped again using the same steps as above.
Step Four: Once your background page border is completed stamped, give the ink a second to try and then use your blender tool and the same ink pads to fill in the background and give it a softer colored look. Make sure to blend the inks at the transition points between the different colors.
Step Five: Complete your layout! See….easy peasy!
Here’s the video showing the whole process as well as how I finished off the rest of the layout…
The supply list for this video is below. Please remember that these are affiliate links meaning that they don’t cost you a thing to use but they help me out when it comes to prizes, products, and providing great content.
xoxo,
Khristina
SUPPLY LIST
Ink Road Stamps: This Stamp is Bananas
Catherine Pooler—Mini Archival Black Ink Pad
Catherine Pooler—Round Acrylic Stamping Block
Catherine Pooler—Tutti Frutti Ink Pad
Catherine Pooler—Suede Shoes Ink Pad
Catherine Pooler—Mardi Gras Ink Pad
Catherine Pooler—Flirty Fuchsia Ink Pad
Scrapbook.com Ink Blending Tool with Domed Applicators
**Use the code PH19KHRISTINA….Paperhouse Productions—Color Washed Sticker Book